|
I originally posted this project on Instructables for their Lazy Life contest (I won!) and wanted to also post the instructions here: however, there was a lot of amazingly creative and productive discussion in the comments over on Instructables, so be sure to check out the notes from other makers who tackled this blanket and found some other fillers/ideas. See the Instructable --> 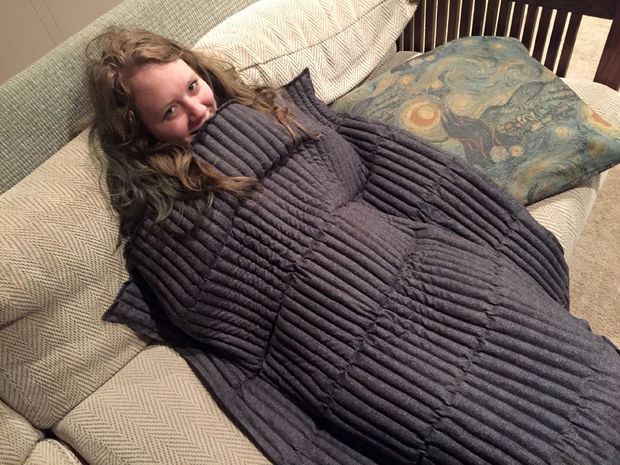 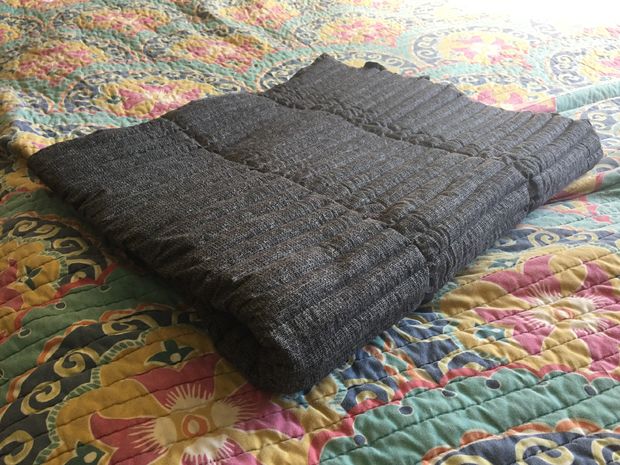 Targeted advertising has me pegged--I was recently scrolling through facebook when an ad for a "relaxing gravity blanket," claiming to be "like Advil PM for your whole body," grabbed my attention. The blanket, weighing in at 15, 20, or 25 pounds, promises more restful sleep, to ease stress and anxiety, and help your mind and body relax...all by laying under the heavy blanket. Weighted blankets have long been used therapeutically for people with sensory sensitivity or restless leg syndrome, as well as to increase focus (particularly in classroom settings). Newer studies are finding that these heavy blankets increase serotonin and melatonin levels while also lowering cortisol levels. Your mood improves, and because the weight minimizes movement during sleep, it helps your body stay in a deeper sleep for longer. I have several family members who struggle with sleep and/or anxiety, so weighted blankets sounded like an amazing solution. I was sold--but yikes! This blanket carries a price tag of nearly $300. I set out to make my own with a budget of $50, using plastic pellets for the weight. There are a few sites with instructions to make your own therapy weighted blankets, but these instructions had blankets with just a few large sewn sections for the plastic pellets; this means that the pellets are free to move around within the fabric as you shift and move, giving a less consistent distribution of weight. I wanted to make a blanket with many small compartments packed full of the plastic pellets. My blanket has 480 1"x6" compartments, each filled with the plastic pellets. This ensures a consistent and even distribution of weight while also giving the blanket a sleek, modern look. After enjoying my weighted blanket, I can honestly say that all the advertised hype was true. Getting lazy underneath a blanket while reading a book or watching TV is super relaxing, and seems to ease my muscles. I tend to move around a ton while sleeping or sitting, but with the blanket on I can stay in the same position for hours (and I find that I'll spend more time reading without my brain and body getting distracted). The only "problem" is that my children and husband also find the blanket to be deeply comforting; we often argue about who gets to use the blanket while we all relax in the living room together. I should say that while this is primarily a sewing project and may appear intimidating, I am not a strong sewer. This project is great for anyone with a sewing machine who can sew mostly straight lines. Tools and Materials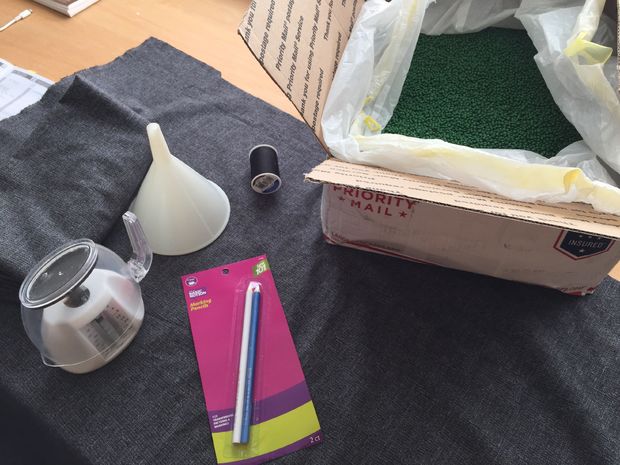 Tools: Funnel Sewing Machine Measuring Tape Water-soluble Fabric Pencil Scissors Sewing pins Metal Ruler (optional) Materials: Plastic Pellets - This is where our blanket gets its weight. Follow the general rule of 15lbs for a person weighing 100-150lbs, 20lbs for 150-200, and 25lbs for 200+. Make sure to buy pellets that are washer and dryer-safe. I found the cheapest source to be Etsy, where I bought 20lbs of polymer pellets for around $38. Pellets are also available on amazon and through other craft suppliers. 5 Yards of Fabric - This will make a blanket that is roughly twin bed size. I used a quilting cotton because it was inexpensive and light-weight, plus there are so many fun and crazy prints to choose from. As I anticipated my blanket getting a lot of use from everyone in the family, I opted for a dirt-and-stain-hiding dark print. Plastic Tubing (optional) - if your fabric of choice is textures or fuzzy, the plastic pellets will have a hard time getting to the bottom of the sewn channels. If you find your pellets getting caught, buy a seven-foot piece of inexpensive plastic tubing from your local brewer's supply store that fits onto the bottom of your funnel. Thread - You'll need two rolls Step 1: Sew the Basic BlanketWash, dry, and iron your fabric. Pre-washing your fabric removes chemicals and pre-shrinks your fabric. Cut your fabric in half so that you have two pieces that are 2 and a half yards long. Place the right sides of your fabric together. Pin around both long edges and one short edge, leaving one short end of the blanket (the top edge) open. After you've sewn a big U, clip your corners to ensure that they are nice and crisp. Turn the blanket inside-out and push the corners out until they are sharp. Iron the sewn edges. Now, put one corner of the open top edge on the ironing board. Fold the raw edges inside about a quarter-inch. Working from one corner to the other, iron down the edges. Take the blanket back to the sewing machine and sew a half-inch border around the bottom and sides of the blanket. Step 2: Sew Vertical Rows Spread out your blanket on the floor or a large table with the unsewn edge at the top. Using a measuring tape and a water-soluble fabric marking pencil, make a large vertical mark every inch all the way across the blanket. Move your tape down a few inches and repeat the marks. Continue marking all the way down the blanket until you have the entire thing covered. Take your fabric over to the sewing machine. Starting at the bottom of the blanket, sew along your marks from the bottom all the way up to the top. Then keep sewing for what seems like forever until you have sewn inch-wide channels across the entire blanket. Step 3: Fill and Sew Horizontal Rows Starting 6" up from the the bottom edge, mark horizontal lines across your blanket at 6" increments. These lines will be your guide for sewing and closing each row of pellet pockets. Time to get some weight in this blanket! If you use a smooth fabric like I did, insert the end of your funnel into the first row and slowly pour about 1/8th cup of beads into the funnel. If you used a more textured or fuzzy fabric, slide your piece of plastic tubing down into the first row until you reach the bottom of the blanket, attach the funnel at the top, and pour in the plastic pellets. Shake the funnel and blanket up and down a bit to shake the pellets down into the channel (don't worry about getting the pellets all the way down to the bottom yet, just get them into their channel and out of the funnel). Move the funnel into the next channel and repeat, over and over, until you've poured pellets into each channel. Pick up the top corners of the blanket and let the bottom of the blanket hang just above the floor. Shake the blanket up and down until all of the pellets shake into the very bottom of the blanket. Unless you have flawless sewing skills or are a sewing robot, it is likely that your sewn channels are not all exactly one inch apart the entire way from bottom to top of the blanket (mine certainly weren't). This means that even though you are putting the same measurement of pellets into each row, they will not fill up equally. Lay your bottom row with all the filled-up pockets on a table and evaluate if the pellets fill the row up to your 6" line. If the pellets do not fill up to the line, grab your funnel and add more pellets (you'll have to shake them down again, so make sure to fill these rows before moving onto dealing with over-filled rows). If it goes over the line, use a metal ruler or your fingers/fingernails to push the excess pellets back up towards the top of the blanket a little bit. Use your fingers or a metal ruler to help clear beads out of the way until you have a half-inch space above your 6" line with no pellets. Carefully carry your blanket over to the sewing machine. With the row full of pellets on your left and the unfilled blanket rolled up on your right, start sewing across the blanket. Use your 6" mark as a guide to keep your stitch straight. As you go, keep clearing the pellets out of the way of the sewing machine foot. Once your row is completely sewn across and the pellets are all safely captured in their new homes, repeat the funnel-pellet-shaking-sewing process over and over and over until you are left with just the top 6" of your blanket unfilled. As you sew the rows, the blanket keeps getting heavier and heavier and more difficult to work with. I found it best to keep the bulk of the blanket on the left side of the sewing machine; the blanket folds neatly along the sewn 6" lines. Step 4: Close Top Edge and Get Cozy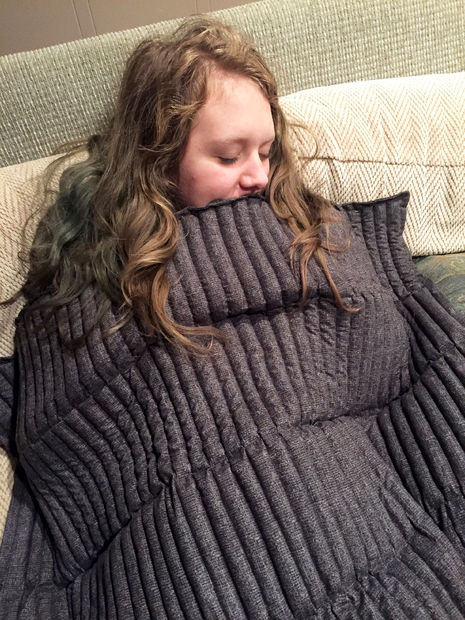 Once you get to your final row of beads, things get a little more finicky. This row is slow going.
Starting at one end, carefully fill the pocket with pellets until it is filled to about a half-inch down from the top of the blanket. Take a sewing pin and weave in and out of the fabric in small increments right up against the packed-down pellets to seal them into the pocket. Continue going row by row, pin by pin, to fill the entire row. Start carefully sewing the row shut, removing pins as you go. The pins should allow you to sew within one-fourth of an inch from the top edge of the blanket.Move along slowly along the top edge. After the row is complete, sew right along the very tippy-top edge to give it a crisp, neat close. Congrats! You're finished! Lay down or sit in a chair and get that blanket on top of you. Chill out and enjoy the natural, medicine-free feelings of relaxation.
11 Comments
2/28/2024 02:52:39 am
Grateful for the Online Quran Academy! Their knowledgeable teachers, engaging lessons, and emphasis on understanding and application have deepened my connection to the Quran. 2/28/2024 05:01:51 am
Highly recommend men's tungsten wedding bands! Mine is not only stylish but also incredibly durable, ensuring it will last a lifetime. 3/1/2024 05:06:53 am
Had the most memorable celebration at a beautiful farm house in Delhi. The serene surroundings and lush greenery made it an ideal escape from the city hustle. The spacious layout was perfect for accommodating all our guests comfortably, and the amenities provided ensured everyone had a fantastic time. Highly recommended for anyone looking for a picturesque party venue! 3/4/2024 03:11:43 am
I wanted to create you a little bit of note to be able to thank you as before on your gorgeous things you have shown in this case. It was quite seriously open-handed with you in giving unreservedly just what numerous people could possibly have supplied as an electronic book to generate some profit on their own, principally considering the fact that you might have tried it if you ever considered necessary. Those inspiring ideas also acted as the easy way to realize that other people have the identical fervor just like my very own to understand lots more in terms of this condition. I think there are millions of more enjoyable opportunities up front for folks who read through your blog. click my site here – alternative medicine
Himovies is a gem of a streaming service! I'm impressed by the variety of content available, catering to every taste and preference. The platform is user-friendly, making it easy to find and enjoy my favorite movies and shows. Highly recommended for avid movie buffs!
I'm thoroughly impressed with Gomovies! Their extensive collection of movies and TV shows ensures that there's always something new and exciting to watch. I appreciate the ease of use of their platform, as well as the high-quality streaming experience they provide. Whether I'm binge-watching my favorite series or exploring new releases, Gomovies never fails to deliver. With their vast selection and seamless streaming, Gomovies has become my go-to destination for all things entertainment! 3/31/2024 03:43:47 am
As someone on a weight loss journey, I rely on weight loss supplements from this fitness supplements store. Their products are effective and help me stay on track with my goals. Additionally, their range of whey protein is excellent for muscle recovery and growth. Highly recommend! 4/7/2024 03:27:46 am
Samehadaku is my go-to source for the latest anime updates. Their website offers a vast collection of episodes and series, all conveniently organized for easy browsing. I appreciate their commitment to providing high-quality content and their dedication to serving the anime community. 4/9/2024 12:57:10 pm
After study a few of the websites on the website now, and i genuinely much like your way of blogging. I bookmarked it to my bookmark internet site list and will also be checking back soon. Pls have a look at my internet site as well and let me know what you think. 4/17/2024 12:13:43 pm
I stumbled upon Kimcartoon while searching for a reliable source to watch cartoons online, and I'm so glad I did. Their website boasts an extensive library of cartoons and animated series, covering a wide range of genres and interests. I love how regularly they update their collection with new episodes and releases, ensuring there's always something fresh to watch. The streaming quality is exceptional, and I appreciate the absence of annoying ads that often plague other streaming platforms. Kimcartoon has quickly become my favorite destination for all things cartoons. Leave a Reply. |