|
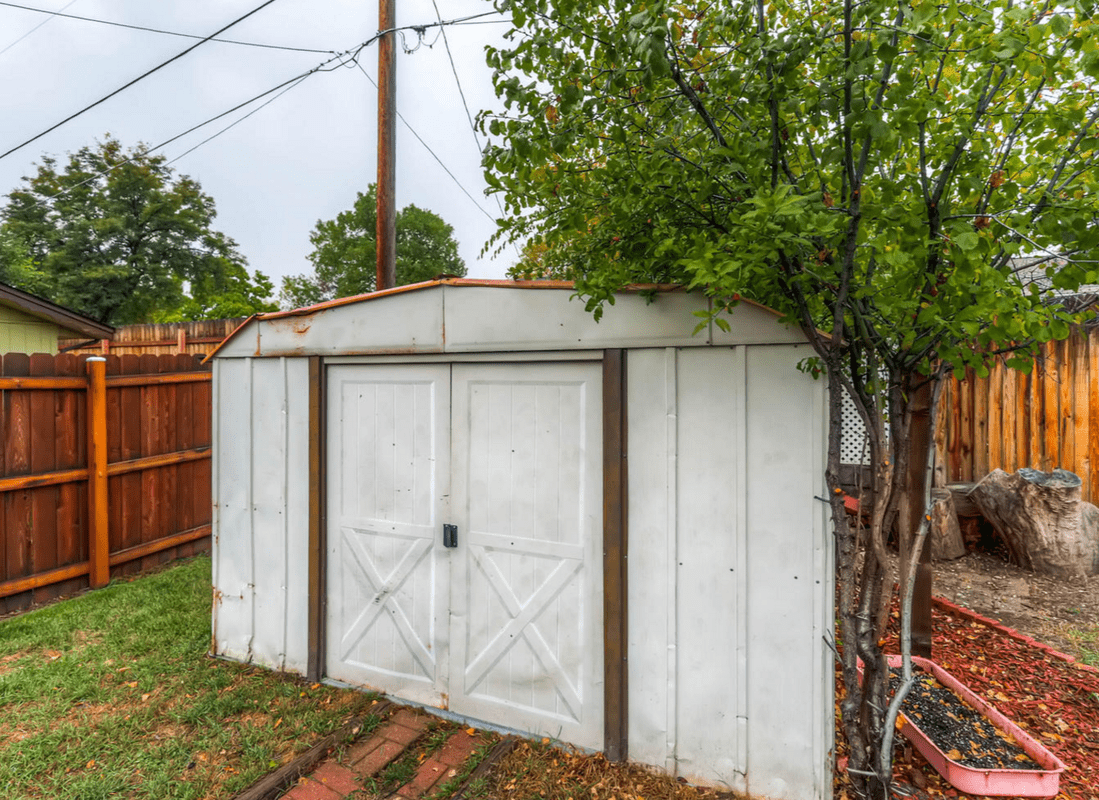
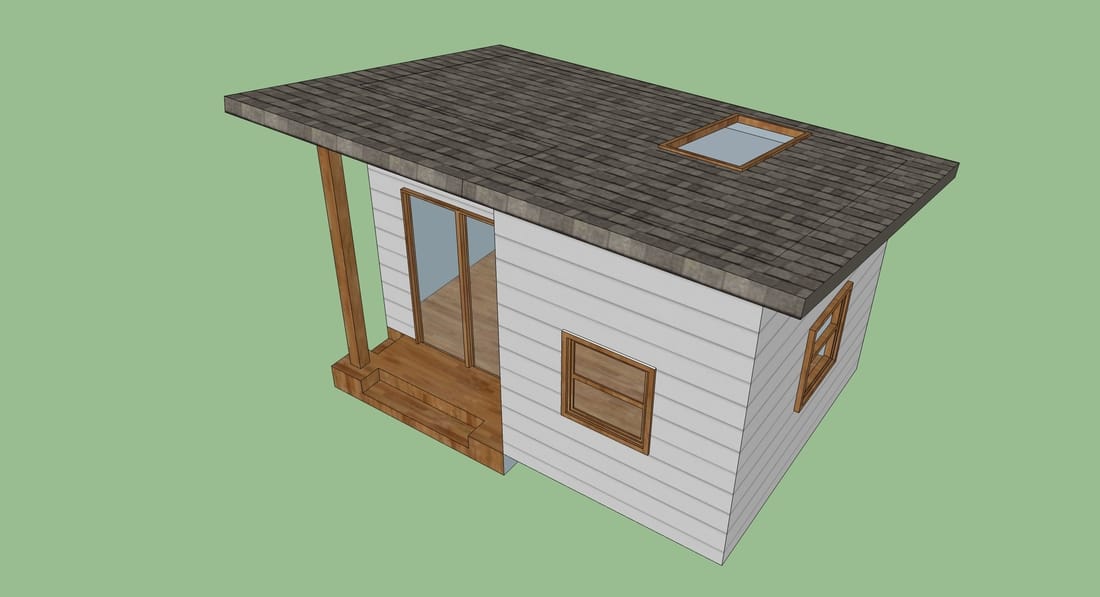
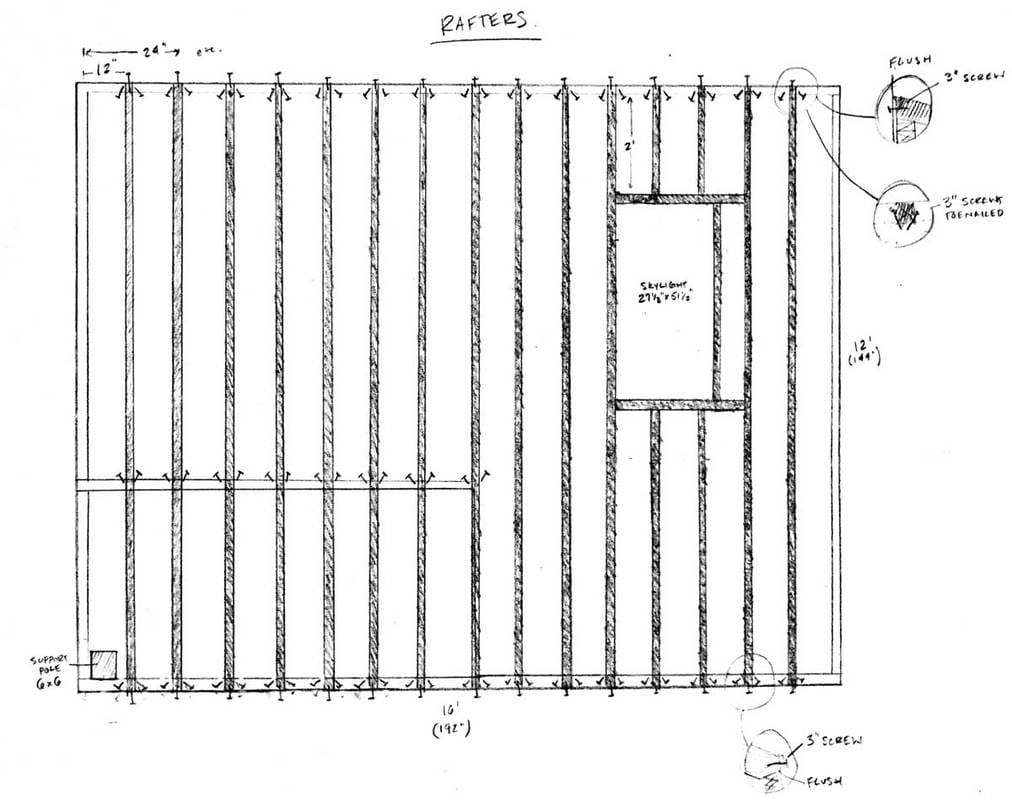
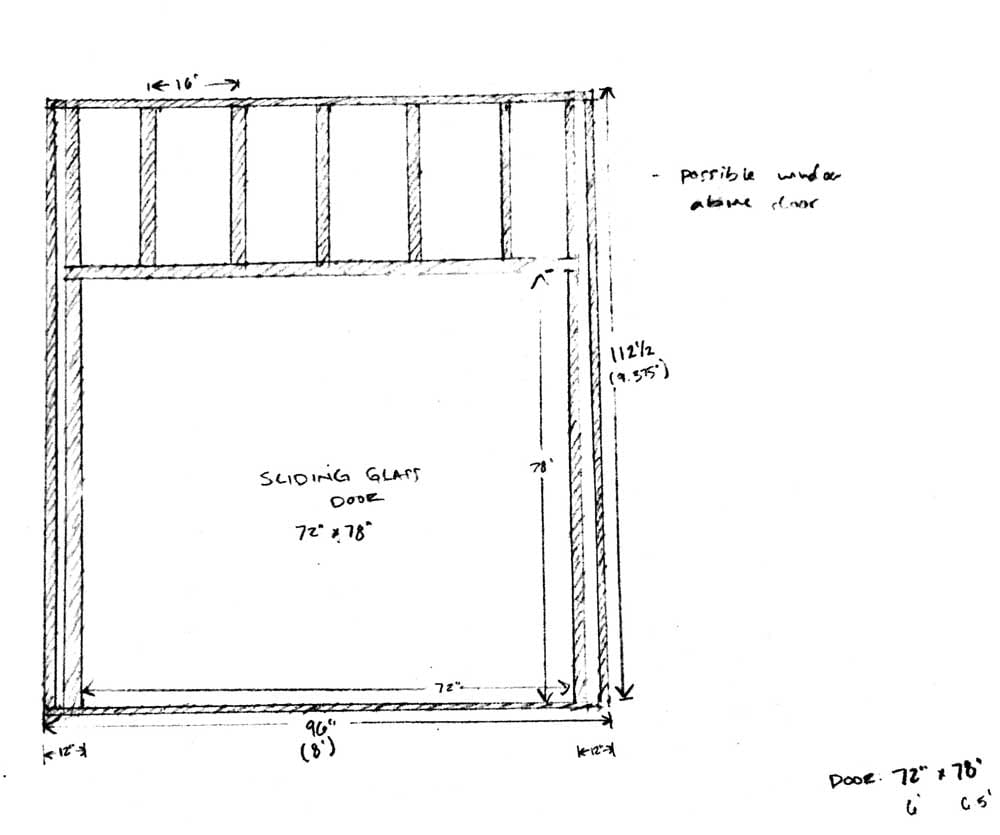
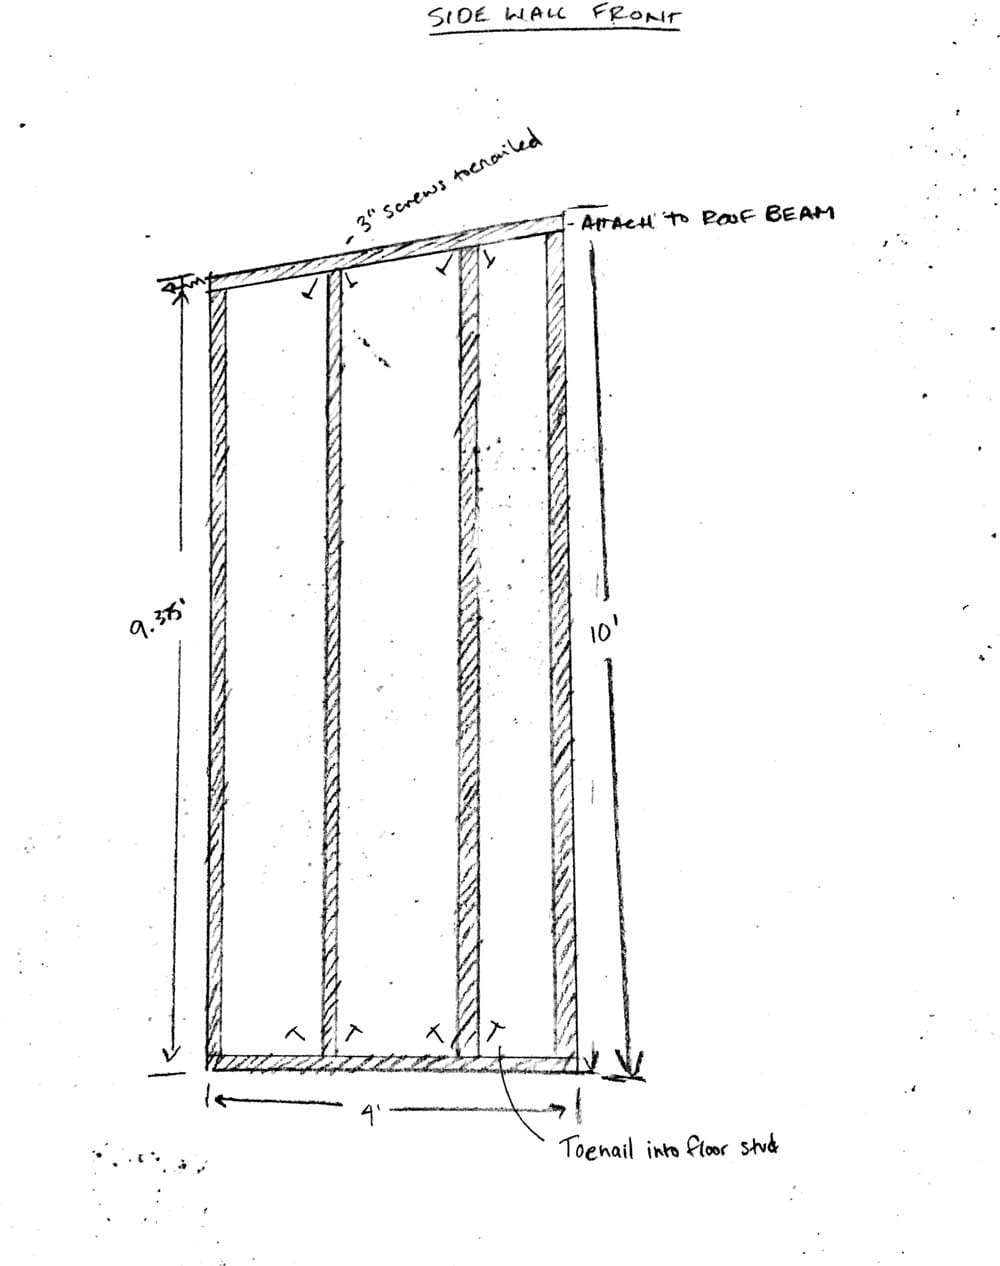
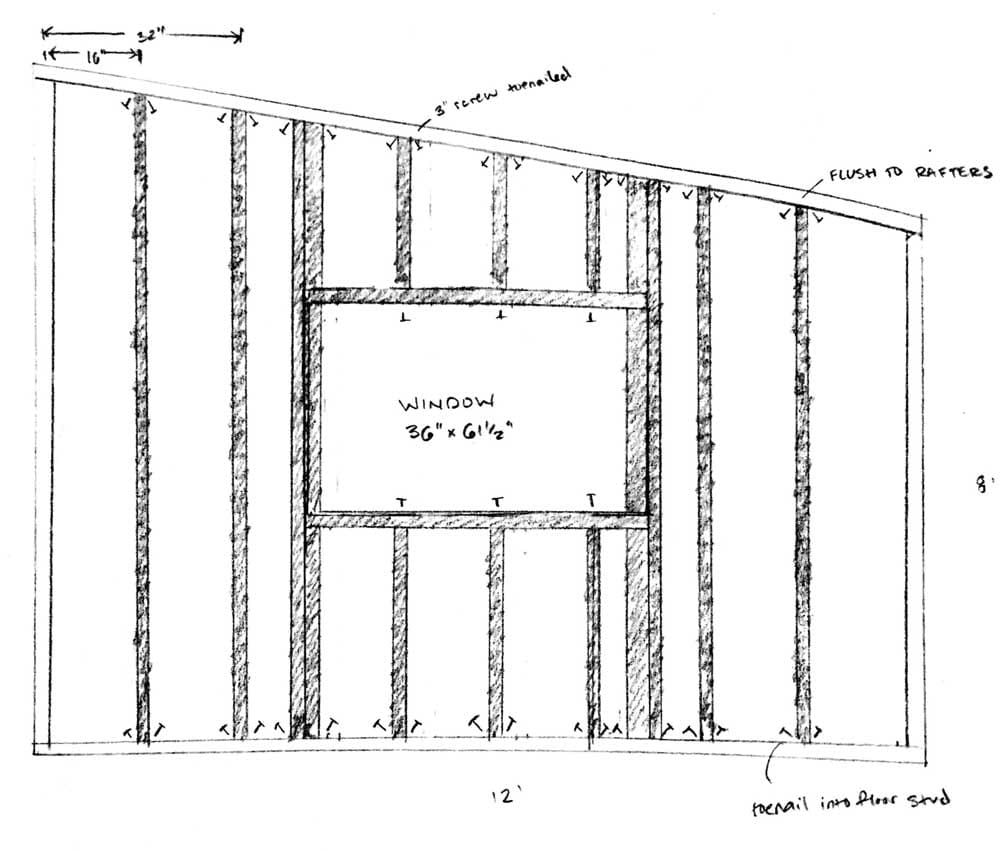
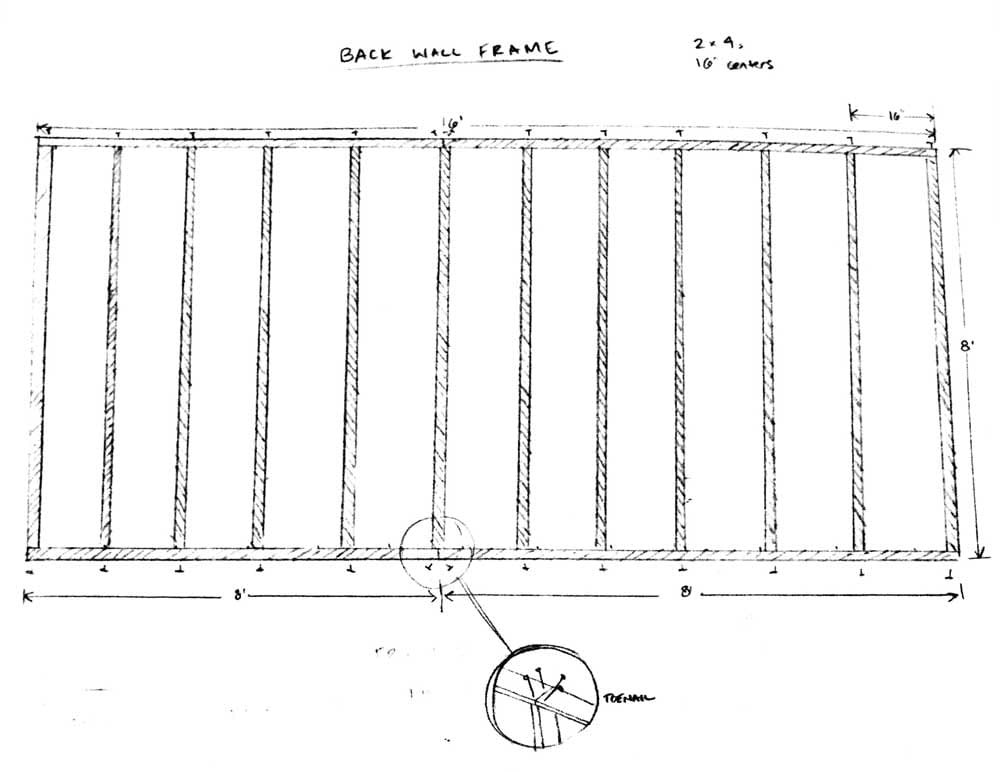
PERMIT was this monstrous, scary word I had avoided in all of my previous home projects. At our home in Florida, I would research residential code and skate just underneath the requirements for permitting (or, in the case of running electrical to my backyard shed studio, seek help from genius friends and plan to claim official idiocy if the need arose). My permit-avoidance strategy worked until my current big project: designing and building a backyard artist studio from the ground up. When we bought our lovely little brick home in Arvada, the backyard was outfitted with a rusting metal shed flanked by gnarly tree bushes and lined with diagonally-embedded bricks. Now a spoiled backyard artist, I knew this metal tetanus heap was sitting on the hallowed ground of what would one day be my new den of creative wonders. I also quickly discovered that in order to create this palace of art, I would need to get permits. I spent a lot of time procrastinating this whole permit issue by sketching endless iterations of my future studio. What if it had a door to a greenhouse? What if it had two stories? What if it had a roof deck? How do I build a circular hobbit door? These outlandish ideas (and more!) crept the looming PERMIT away; until I had a solid plan, I didn't need to even think about a permit! That didn't last for too long--after all, all of Art's stuff was sitting, aching, dying in the attic. I had to attack the PERMIT. The city of Arvada requires permits for accessory buildings over 120 square feet. Originally I was determined to stay beneath this threshold in order to avoid the seemingly daunting task of talking to the government and acquiring a permit; further research deemed this impossible, as any size structure with electrical wiring needs a permit. Fortunately, this little permit issue freed up my thinking: Since I have to get a permit anyway, I will make this as big as I want. At 192 square feet (160 inside), my studio fits beautifully in the yard will provide a ton of creative space. Building a brand new structure was virgin territory for me, so my initial thought was to buy some sort of wood shed kit; this didn't work out. The market is flush with barn-style roofs and big shed doors, neither of which are elements I enjoy. Kits of a more modern persuasion were either extremely costly or had a teeny footprint. In the end, I sneakily downloaded the constructions plans for a 10'x7.5' Costco shed with a general roofline I liked and adapted the framing to local building code. For some reason I thought that shed kit plans would have really great instructions on constructing walls. That was a total lie (for the curious, those plans available here under "more details"). But it gave me a starting point, and I was able to sketch out the framing with enough mock-confidence to just go for it. I stomped around the backyard with a tape measure and spray paint to determine how large I could make this building and fit it into the existing structures and plantings of our property. With a sizable footprint marked out in the yard, I took my dimensions to SketchUp. At first I had a big box with a sloped roof. The looming 10-foot front looked awful as a big, solid hunk of wall; I pushed half of it backwards (I had never used SketchUp before, so the novelty of the Push-Pull was fresh), creating an entry porch and adding much-needed dimension to the front. 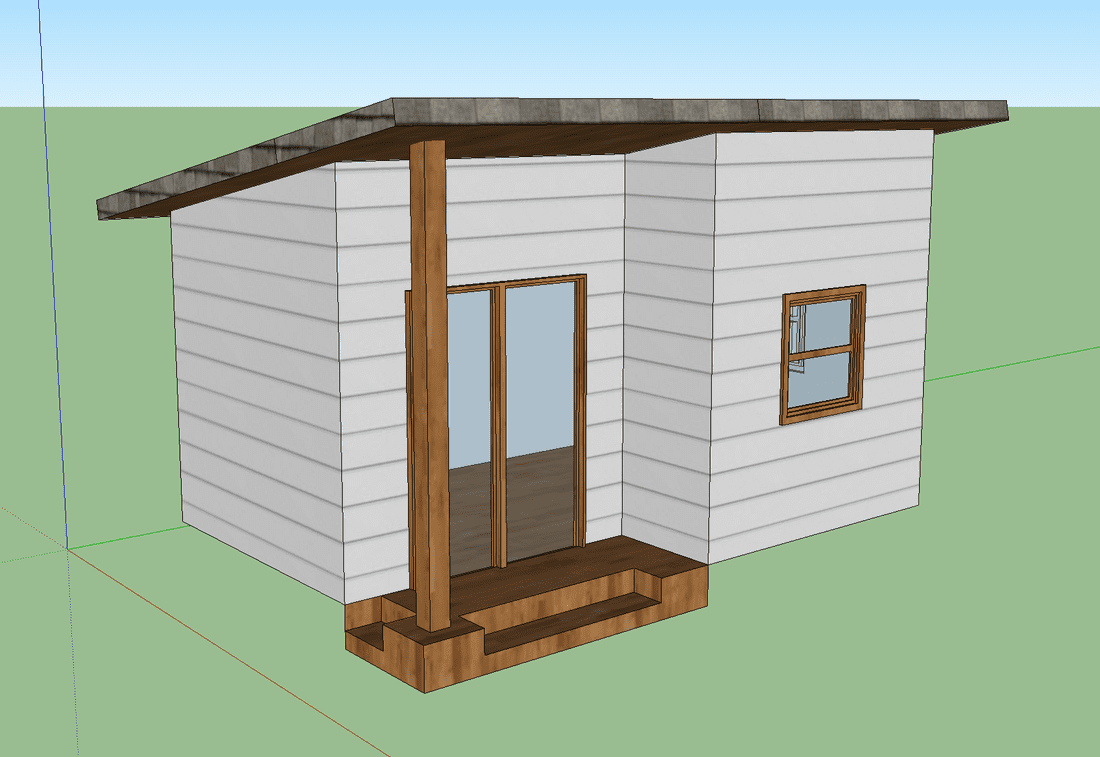 My first SketchUp! My first SketchUp! SketchUp helped enormously. With my exterior dimensions somewhat decided, I picked up salvage windows and a sliding glass door through a trade with Croft Family Farm. The skylight came from craigslist, but in the end I decided not to do a skylight so it will return to craigslist. With the windows and door acquired, I sketched out the framing. Part of the reason that getting a permit seemed such a daunting task was that I could find no DIY examples online of what was required to apply. For that reason, I'm including some of my drawings for the framing--future studio-builders, these are the drawings I took to City Hall. After sketching out the framing for each wall, I took the drawings and a simple site plan to the permit office with the intention of finding out what else I needed to prepare for the process. SURPRISE, the drawings of the framing were all I needed! A man stood with me for about an hour, going over the details of each drawing with me. He checked the code in a huge book and told me what lumber to use for each application. He wrote corrections in red pen and stamped every page with approval, tucked the stack into a yellowed folder, and handed it to me with a "congratulations, here's your permit (that will be $175, please)."
4 Comments
Phil Cotton
7/2/2019 06:47:07 pm
Hi, I’m an artist/designer living in Chicago. I’m planning to build a artist studio shed in my backyard, size 20 x10x 10. Your article was very helpful , I need to find out what kind of permit I need for my shed design also I plan to design and create the architectural drawings for the shed. Do you have any other advise before I talk to city building department? Thanks!
Reply
7/2/2019 10:01:08 pm
Hi Phil! My best advice is to go into the permit office with a smile, an observing eye, and the mindset of a beginner. I'm sure it varies greatly by city, but the staff at my City Hall were unbelievably kind. I explained what I was building and why, and asked them what the steps were and what I needed to provide. They did "correct" me when I said I was building an artist studio, and said with a sideways glance "you are building a shed for your non-commercial hobby?" I took the hint and changed my language when talking about the studio with the city.
Reply
Leave a Reply. |

